CREATE A FACEBOOK BUSINESS PAGE
This is a guide for creating a Facebook page. A Facebook page is an extension of your business that shows the personality of your business and its culture. Do not solely use it as a platform to sell, promote and advertise. People go on Facebook for social interaction. Get this right and you will surely win the hearts and minds of your audience.
If you have never created a Facebook page for your business before; start here in the Facebook Business Manager. If you already created a page from your personal profile then skip to STEP 8 for steps to managing your page from the business manager.
If you manage your page from the business manager, then you will have access to tools that you wouldn’t have from managing your page from your personal account.
Step 1) Create a Facebook Business Manager Account by visiting business.facebook.com
Step 2) On a separate internet tab, visit facebook.com and log in to your personal account or the Facebook account that you use for your business.
Keep in mind that if you use a personal profile for your business to ensure that your name is that of a business “avatar”; meaning that it should look and sound like a real person. For example, instead of using First Name: Spuhgetti, Last Name: Marketing, I would use the name First Name: Spud, Last Name: Marks. The name is fake but real enough for Facebook to recognize it as a real person. Otherwise, Facebook’s auditing system will shut down your “personal profile” and you will not be able to access your business manager.
This is to ensure that Facebook profiles are clean of automated bots and used by real people.
Step 3) Once you are logged into your Facebook personal profile, switch to the business.facebook.com tab and click on the blue “Create Account” button on the top right corner.
Follow the step by step guide in creating an account. Don’t be too worried on what name to give your account. Everything that you input in these steps can be changed later in your settings.
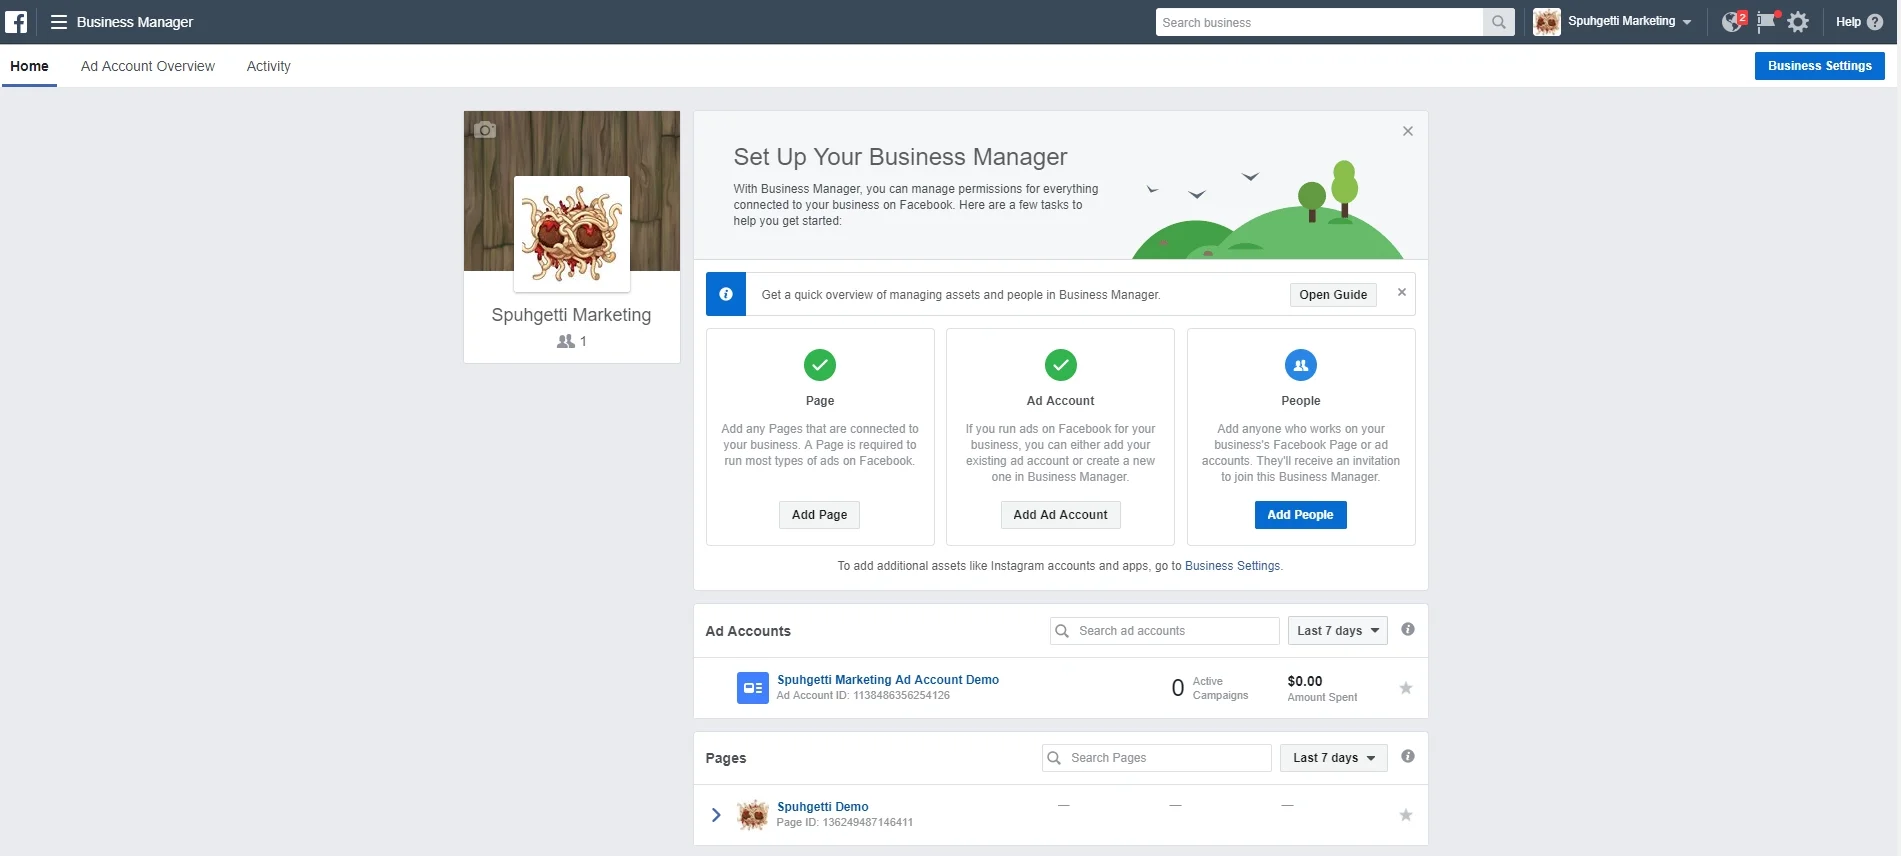
This is your business manager interface. Things will look a little different on your screen than what you see in this guide due to the fact that things have already been created on my end.
Step 4) Click on the button “Add Page” located in the center of the page. Note that the guide shows a green check mark and the button is grey. Your button will be blue and you will not see a green circle with a check mark.
A pop up will appear with three choices, “Add Page”, Request Access” and “Create Page”.
Step 5) Click on the Button “Create Page” on the right side of the pop up.
Another popup will come up prompting you to choose a Category. Again, don’t take too long deciding this but be as close as you can be. You are able to change this later in the business settings.
Step 6) Choose a Category based on the type of your business
Once you choose a category, you will input your Page Name. I would recommend you use the name of your business or at least the face or the mascot of your business. Just know that you can always change this, HOWEVER, you will have to go through a process. Sometimes, Facebook will not allow you to change the name because it is too different from the original name. So be sure to have a name locked down at this step.
Step 7) Type in the Page Name and specify the category and click on the blue button “ Create Page”.
Your page will appear in your list of pages on the main interface of your Business Manager
And there you have it! You created you Facebook Page. Easy Peazy.
Now if you already created a page from your personal profile and would like to manage it through your Facebook Business Manager so that you can advertise and use the marketing tools for it, then follow these steps…
Step 8) From the main interface of your business manager, click on the “Add Page” Button.
Step 9) Click on the blue “Add Page” button
The page you are adding appears in your personal profile “Pages” tab on the left side of your Facebook
Step 10) Type in the name of your page or URL. In this guide, the page I created is called, “Personal Page Created”. This is the name of the page I would type in this prompt.
Step 11) Click on the blue button “Add Page”.
And since you created this page on your personal profile, Facebook will recognize that, and automatically place you as an admin of the page.
Step 12) Click on the blue button “close” and your page should appear on the list of pages on your main interface of your business manager. You may have to hit “refresh” on your web browser for your page to show up on your list.
Note that you will no longer be able to manage this page from your Facebook app on your phone. You will need to download a separate app called “Facebook Pages Manager”. Search in your apps store “Facebook Pages Manager” and the icon is this orange flag.
This concludes how to create a Facebook page on the Facebook Business Manager. Be sure to follow the guide on how to create an ad account. The ad account is where you will create advertising campaigns and analyze advertising data.


